THINKSCAN PLUS S7
To use THINKSCAN PLUS 7, you can refer to the user manual for detailed instructions. You can find the user manual by visiting and searching for “THINKSCAN PLUS 7 user manual”. The user manual provides a comprehensive guide on how to use the device, including initial use, language setting, Wi-Fi connection, diagnostic functions, maintenance and reset, and more.
Most OBD-II compliant vehicles are compatible with the device, which covers almost all car models from the US, Europe, and Asia. However, it may not work with certain older or exotic vehicles that use non-standard protocols or connectors.
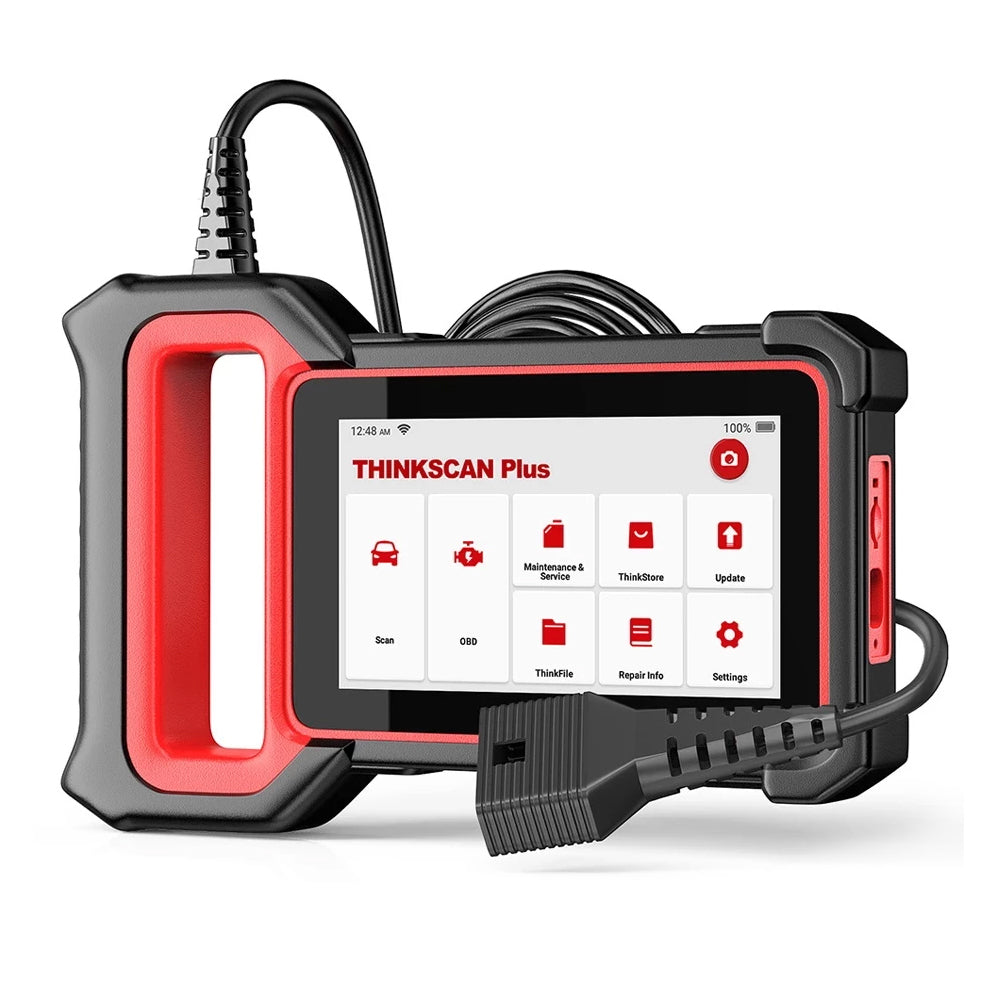
THINKSCAN PLUS 7 supports diagnostic ECM/ABS/SRS/TCM/BCM/AC/IC system errors and deletes the errors. It also supports full OBD2 functions, including read/clear codes, data stream, I/M readiness, O2 sensor, DTC look up, and more. It can do 5 reset services functions like you choose. You can do screen shortcuts via I/M key with THINKSCAN PLUS 7 devices, easy and fast. It supports printing diagnostic report data and checking errors. Software updates are free for life.
Disclaimer: Additional software purchases are made thru the Thinkcar App.
If you have any questions you are welcome to reach out to us via our contact us page for further assistance.
To register and update your THINKSCAN PLUS 7, please follow the steps below:
- Download the THINKSCAN update tool from the official website.
- Connect your THINKSCAN PLUS 7 to your computer using a USB cable.
- Launch the THINKSCAN update tool and click on the Device Upgrade button.
- Enter your email address and registration code when prompted and click on Submit to complete the registration process.
- Once registered, you can download the latest software and firmware updates for your THINKSCAN PLUS 7 from the website.
1. Start the tool and ensure a stable Internet connection.
2.Go to "Set up" -> "App Update", click "OTA" and then click "check version" to enter the system upgrade interface.
3. Complete the process by following the instructions on the screen step by step. It may take a few minutes depending on the internet speed. Please be patient. After successfully completing the upgrade, the tool will automatically restart and enter the main interface.
Check whether the connection with the vehicle diagnostic socket is normal, whether the ignition switch is on, and whether the tool supports the car.
This may be caused by loose diagnostic dongles. Please unplug the dongle and reconnect it firmly.
It is normal and caused by electromagnetic interference.
Please confirm:
1. Whether diagnostic dongle is correctly connected.
2. Whether ignition switch is ON.
3. If all checks are normal, send vehicle year, make, model and VIN number to us using contact us page.
1. Whether diagnostic dongle is correctly connected.
2. Whether ignition switch is ON.
3. If all checks are normal, send vehicle year, make, model and VIN number to us using contact us page.


Customer Reviews
Based on 2 reviews
Write a review